

 Proudly American
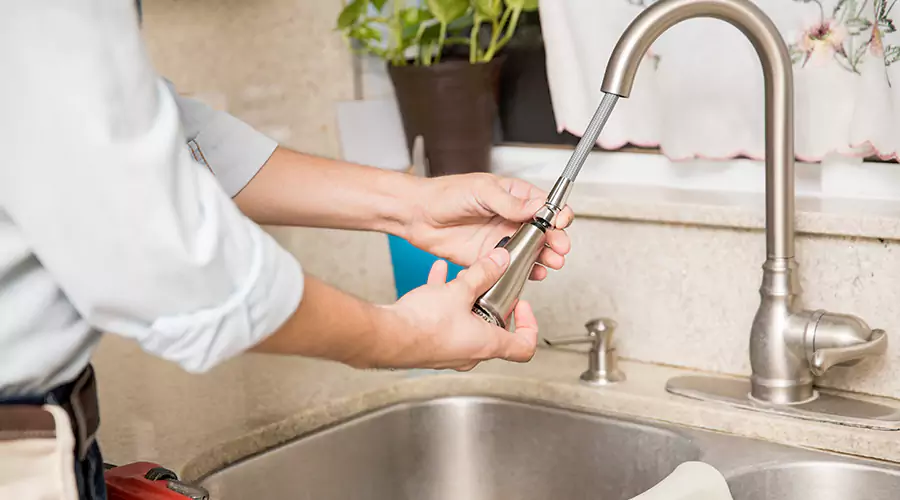
If your faucet suddenly starts running slow, the fix is often simple: the aerator is clogged. The aerator is the small screen at the tip of the faucet that mixes air with water and controls the spray pattern. Over time, it can trap sand, sediment, and mineral deposits that restrict flow.
This DIY guide shows you how to unclog a faucet aerator safely, step by step, and get normal water flow back fast.
What Is a Faucet Aerator?
A faucet aerator is a small threaded piece on the end of most sink faucets. It does three main things:
- Improves the spray pattern
- Reduces splashing
- Saves water by mixing air into the stream
Because it has a screen, it is also a common place for debris to collect.
Signs Your Aerator Is Clogged
A clogged aerator usually causes problems at only one faucet.
Common symptoms
- Water pressure is low at one faucet only
- The flow is uneven or sprays sideways
- Water looks cloudy at first (air mixing) but the flow is still weak
- Hot and cold are both slow at the same faucet
If every faucet is slow, the issue is likely not just an aerator.
Tools and Supplies You Need
Most jobs take 10 to 20 minutes.
- Towel or rag
- Adjustable wrench or pliers (optional)
- White vinegar
- Small bowl or cup
- Old toothbrush
- Toothpick or paperclip (optional for tiny holes)
Tip: If you use pliers, wrap the aerator with a towel first to avoid scratching the finish.
Step by Step: How to Unclog an Aerator
Step 1: Plug the drain
Before you remove anything, plug the sink drain. Aerator parts are small and easy to lose.
Step 2: Remove the aerator
Most aerators unscrew by turning counterclockwise.
If it is hand tight
Use your hand and a towel for grip.
If it is stuck
- Wrap the aerator with a towel
- Use pliers gently, turning counterclockwise
- Apply steady pressure, not sudden force
If your faucet has a hidden aerator, it may require a small key tool provided by the manufacturer.
Step 3: Take it apart carefully
Many aerators have layers:
- Housing
- Screen
- Flow restrictor
- Rubber washer
Place parts in order on a towel so reassembly is easy.
Step 4: Rinse and inspect
Rinse each part under running water. Look for:
- Sand or grit
- White mineral buildup
- Torn screen or damaged washer
If the screen is torn, replacing the aerator is usually the best option.
Step 5: Soak in vinegar to remove mineral buildup
If you see white crusty deposits, soak the parts.
Vinegar soak method
- Put the aerator parts in a small bowl.
- Cover them with white vinegar.
- Let them soak for 20 to 30 minutes.
- Scrub gently with an old toothbrush.
- Rinse thoroughly.
For heavy buildup, you can soak longer, but check occasionally.
Step 6: Clear blocked holes if needed
If small holes are still clogged:
- Use a toothpick or paperclip carefully
- Avoid enlarging holes or damaging the screen
Step 7: Reassemble and reinstall
Put the parts back in the same order. Screw the aerator back on by hand until snug.
Avoid overtightening. Hand tight is usually enough.
Step 8: Flush and test
Turn on the faucet and run water for 30 seconds.
- Check if the flow improved
- Check spray pattern
- Look for drips at the aerator connection
If the faucet still runs slow, the blockage may be deeper, such as in a shutoff valve, supply line, or faucet cartridge.
Extra Troubleshooting If Flow Is Still Low
Check hot vs cold
If only hot is slow, the issue could be at the hot shutoff valve, hot supply line, or sediment in the water heater.
If only cold is slow, check the cold shutoff valve and supply line.
Check the shutoff valves
Make sure the valves under the sink are fully open. A partially closed valve can mimic an aerator clog.
Inspect the supply line for kinks
A bent or kinked braided line restricts flow.
How to Prevent Aerator Clogs?
- Clean aerators every few months if you have hard water
- Run water briefly after plumbing work to clear debris
- Consider a whole house filter if you frequently see sediment
FAQ
How often should I clean my aerator?
If you have hard water or sediment, cleaning every 3 to 6 months is a good routine. Otherwise, clean it whenever flow drops.
Can a clogged aerator affect only hot water?
Sometimes yes, but it is more common for both hot and cold to be affected at that faucet. If only hot is slow, check the hot side supply or heater.
Should I replace the aerator instead of cleaning it?
If the screen is damaged, the threads are worn, or buildup is severe, replacement is cheap and often easier.
Final Takeaway
Slow running water at one faucet is often caused by a clogged aerator. The DIY fix is simple: remove the aerator, rinse out debris, soak in vinegar to dissolve mineral buildup, scrub, reassemble, and test. If flow is still weak after cleaning, the problem may be in the shutoff valve, supply line, or faucet cartridge.